Creating an Azure CloudShell
I wanted to create a post to show how to setup a Cloud Shell for the first time, and also a few considerations about doing so because you normally only do this process once for your account.
You can access the Cloud Shell in two ways:
- Direct link: Open a browser to https://shell.azure.com.
- Azure portal: Select the Cloud Shell icon on the Azure portal.
Considerations
- When creating a Cloud Shell you’ll only need to do this once per account (usually)
- Create your Cloud Shell in a management resource group
- Create a storage account specifically for Cloud Shells
Steps
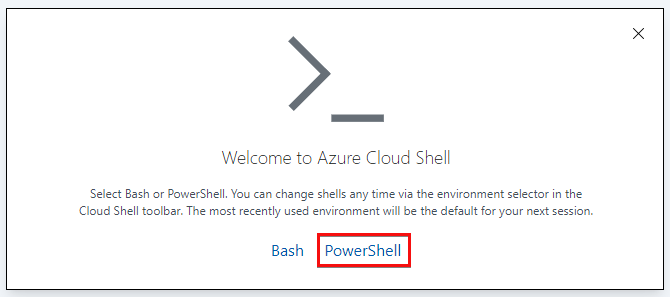
- Open a Cloud ShellLocate the Shell IconSelect PowerShell to get started (you can change it later)
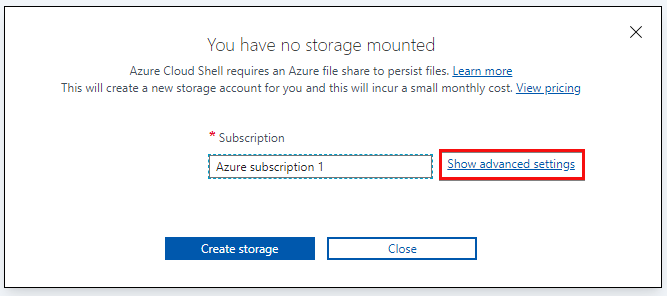
- You will be told you have no storage selected. Click “Show advanced Settings”
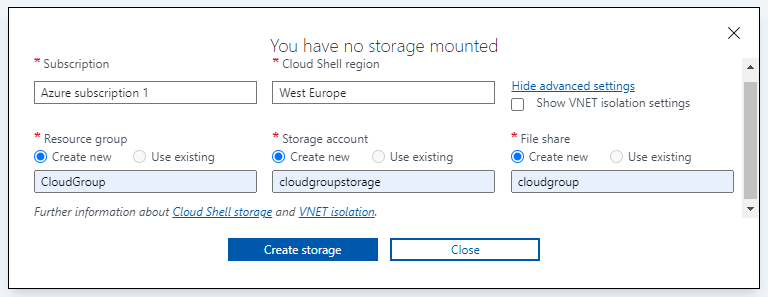
- Populate the fields:
- Subscription
- The Azure subscription you’re creating the Cloud Shell resource under
- If you have more than one; select a subscription which will contain other centralised management resources
- Cloud Shell Region
- The region you’d like to deploy the Cloud Shell resources to
- Pick one closest to you as an example
- Show vNet isolation settings
- Allows the cloud shell to access virtual machines and other resources behind a firewall or using private addresses within Azure.
- Leave unchecked
- Resource Group
- The resource group the Cloud Shell will be associated with
- If you have more than one, select a resource group that is used for management (or create a new one one)
- Storage Account
- The storage account the Shell will store any files generated
- I create a new Storage Account specifically for Shells to group them all together
- Remember the name has to the lower case, between 3 and 24 chars and be globally unique
- File Share
- This will be the file share where the Cloud Shell data will be stored, within an IMG file
- I often call the name of the fileshare my username (in case I wanted to use this storage account for more than one user in the future)
- You will then be presented with a Cloud Shell running in PowerShell. You can easily flick between the BASH shell by changing shells in the top left corner